Thekitchenkits.online is an Amazon Associate and earns from qualifying purchases made through affiliate links on our site at no extra cost to you. This supports our efforts to bring you valuable kitchen-related content.
Table of Contents
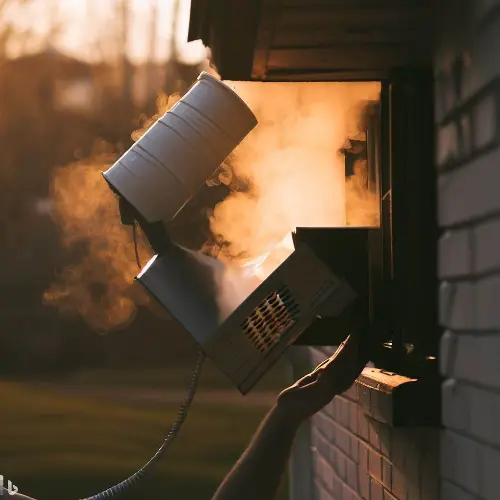
Vent a microwave outside
Installing an over-the-range microwave not only saves counter space but also expels cooking smoke, steam, and odors outdoors, improving your kitchen’s air quality and comfort.
This article offers a concise step-by-step guide on venting your microwave properly. We’ll cover venting options, ductwork planning, installation, exterior vent considerations, and troubleshooting.
With the right preparation, venting your microwave becomes a simple DIY project for a cleaner, more functional kitchen. Discover how to redirect heat and odors outside with ease..
How to Install and Vent an Over-the-Range Microwave
Installing an over-the-range microwave is a great way to save counter space while venting cooking odors and moisture out of your kitchen.
Why Venting Your Microwave is Essential
Properly venting your over-the-range microwave to the exterior of your home provides important benefits:
- Removes smoke, steam, grease, and odors from cooking
- Prevents humidity buildup and condensation
- Keeps kitchen air fresh by expelling pollutants
- Reduces the likelihood of odors spreading through the house
- Facilitates optimal microwave performance with good airflow
Microwaves vented to the outside are always preferable compared to models that simply recirculate air back into the kitchen. This article will cover both exterior and recirculating venting options. Let’s dive in!
Choosing Exterior Vented vs. Recirculating Ventilation
The first big decision is whether your new over-the-range microwave will be:
- Exterior Vented: Ducted outside using venting ductwork, Or
- Recirculating: Filtered and returned to the kitchen
Here’s an overview of the key differences between exterior and recirculating microwave venting:
- Exterior venting is more effective but requires ductwork installation. Recirculating is simpler but less efficient at removing odors/humidity.
- Exterior vented models must be installed near an existing duct or have new ducting added. Recirculating units can go anywhere.
- Exterior venting requires making a duct opening in the wall or roof. Recirculating leaves walls intact.
- Exterior venting costs more upfront but adds value. Recirculating is cheaper to purchase and install.
- Exterior venting uses any CFM. Recirculating works better with lower CFM.
For optimal ventilation, exterior venting is recommended whenever feasible. But recirculating models can also work well in certain home configurations.
Step-by-Step Guide for Exterior Vented Microwave
Follow these key steps to properly install a new over-the-range microwave with exterior ventilation:
- Choose a Duct Location: Decide the best place to route ductwork outside, considering existing ducts, available wall/roof space, and external vent appearance.
- Mount the Microwave Mounting Plate: Securely attach the provided mounting plate following the manufacturer’s instructions. Leave an opening for the venting ductwork.
- Install the Ductwork: Run metal ducting from the microwave vent outlet through the wall/roof to the exterior. Seal exterior opening around ducting.
- Connect Interior Ductwork: Use metal duct tape to seal all joints. Attach ducting securely to the mounting plate opening.
- Mount the Microwave: Following manufacturer instructions, mount the microwave oven onto the mounting plate and connect it to electrical power.
- Test Ventilation Airflow: Turn on the vent fan and check that air is properly drawn through the ductwork to the outside.
- Complete Installation: Make any needed adjustments, close up openings, and install exterior dampers/grilles per instructions.
Key Considerations for Exterior Vented Microwaves
Here are some important factors to consider before installing a new exterior vented over-the-range microwave:
- Available ductwork routing and needed duct modifications
- Desired roof or wall mounting and external vent appearance
- Matching microwave CFM rating to the amount of ducting
- Using rigid metal ductwork for durability and fire safety
- Adding a damper flap to the exterior vent to prevent drafts
- Consulting a professional if extensive ductwork changes are required
With proper planning and installation, exterior microwave venting can make a huge improvement in your kitchen’s air quality and cooking experience.
Installing a Recirculating Microwave Oven
For homes where exterior venting is not practical, a recirculating microwave is a simpler installation. Follow these steps:
- Choose an Installation Location: Pick a spot with proper clearance from your cooking surface, following microwave guidelines.
- Mount the Microwave Plate: Securely attach the provided mounting plate to the bottom of the cabinet.
- Prepare Duct Openings: Remove any duct caps where openings meet the mounting plate. This allows airflow.
- Insert Charcoal Filter: Place the included charcoal filter into the designated filter slot per the manufacturer’s instructions.
- Mount the Microwave: Attach the microwave oven securely onto the mounting plate according to the provided directions.
- Connect Power: Plug in the electrical cord or connect wiring as specified in the appliance guidelines.
- Check Filter Alignment: Confirm duct openings are unobstructed and aligned with the filter area inside the microwave.
- Test Ventilation: Turn on the fan and check for good airflow venting through the filter.
Tips for Choosing a Good Recirculating Microwave
Here are a few tips for selecting the best recirculating microwave model:
- Look for a high CFM rating (300+ ideal) for maximum airflow and filtration.
- Choose a model with large, multi-layer charcoal filters to remove odors/smoke.
- Consider auto and variable speed fans for quieter, more efficient operation.
- Verify the dimensions fit your available installation space.
- Read reviews and avoid models with complaints of poor ventilation.
- Look for useful convenience features like sensor cooking and rapid defrosting.
Common Microwave Venting Issues and Solutions
Here are some troubleshooting tips for common microwave ventilation problems:
- Weak airflow: Check for leaks/gaps in ductwork. Test damper operation and look for obstructions. Ensure ducting meets CFM requirements. Try shorter or smoother ductwork.
- Leaking air, smoke, or odors: Seal gaps around the mounting plate and duct connections. Align filter opening with microwave vent outlet. Make sure vent grates are unblocked. Clean or replace filters if present.
- Exterior vent condensation: Add rear-draft damper to close when not in use. Insulate ducts. Angle ducts to allow drainage outside.
- Frequent charcoal filter changes needed: Confirm the correct size and type of filter. Reduce cooking grease buildup. Upgrade microwave CFM if undersized.
FAQs
Can I vent a microwave outside?
Yes, you can vent a microwave outside. It is a common practice to install a vent hood or range hood that will exhaust the air from the microwave to the outdoors.
What is an OTR microwave?
OTR stands for “over-the-range.” An OTR microwave is a microwave oven that is designed to be mounted above your stove or range. It typically includes a built-in exhaust fan and a light.
How can I vent my microwave outside?
To vent your microwave outside, you will need to install a vent hood or range hood that is connected to a duct system. This will allow the air to be properly exhausted to the outdoors.
Do I need a cabinet for my microwave?
It is not necessary to have a cabinet specifically for your microwave. However, many people choose to install their microwave above their stove or range, which may require a cabinet for support.
What are the options for venting my range microwave?
There are several options for venting your range microwave. You can choose to vent the air outside through a duct system, or you can recirculate the air back into the kitchen using a recirculating exhaust vent.
Can I vent my microwave outdoors?
Yes, you can vent your microwave outdoors. By connecting your microwave to a duct system that leads to the outdoors, you can effectively exhaust the air outside.
How do I vent my microwave to the outside?
To vent your microwave to the outside, you will need to install a duct system that is connected to a vent hood or range hood. This will allow the air to be properly exhausted outdoors.
What is a recirculating exhaust vent?
A recirculating exhaust vent is a system that allows the air to be recirculated back into the kitchen instead of venting it outside. It typically involves the use of filters to remove odors and grease from the air.
Do I need a professional to vent my microwave outside?
It is recommended to hire a professional if you are unsure about venting your microwave outside. They have the expertise and tools necessary to ensure that the venting is done correctly and safely.
Can I vent my microwave without a range hood?
Yes, you can vent your microwave without a range hood. There are alternative options available, such as installing a recirculating exhaust vent or utilizing a different type of ventilation system.
Key Microwave Venting Takeaways
Here are the core concepts to remember:
- Proper venting eliminates odors, humidity, and pollutants from cooking.
- Exterior venting is best when possible, but recirculating can also work.
- Match CFM rating to the amount of ducting for optimal venting capacity.
- Allow for duct routing, openings, and appearance when exterior venting.
- Seal duct connections thoroughly and test airflow before finishing the installation.
- For recirculating models, change filters regularly and choose higher CFM units.
- By properly installing and venting your over-the-range microwave using this guide, you can enjoy clean kitchen air and great cooking convenience.

I’m Ian Welkins, a seasoned professional in the kitchen industry. My passion now drives me to provide invaluable insights into the world of top-notch kitchen products. With years of hands-on experience, I’m your go-to source for culinary excellence.
